VoiceFlow Fax-to-Email Help Guide
VoiceFlow Fax-to-Email gives customers the ability to receive inbound faxes by email and, where enabled, send outbound faxes through the VoiceFlow portal.
VoiceFlow is the replacement fax-to-email platform provided by Easy On Net.
Note: VoiceFlow does not currently support international faxing.
Getting Started
Your VoiceFlow fax service must first be configured by Easy On Net.
In most cases, Easy On Net will complete the initial setup for you, including assigning your fax number, enabling fax delivery, and confirming the email address where inbound faxes should be sent.
Once setup is complete, you will receive your VoiceFlow fax details from Easy On Net.
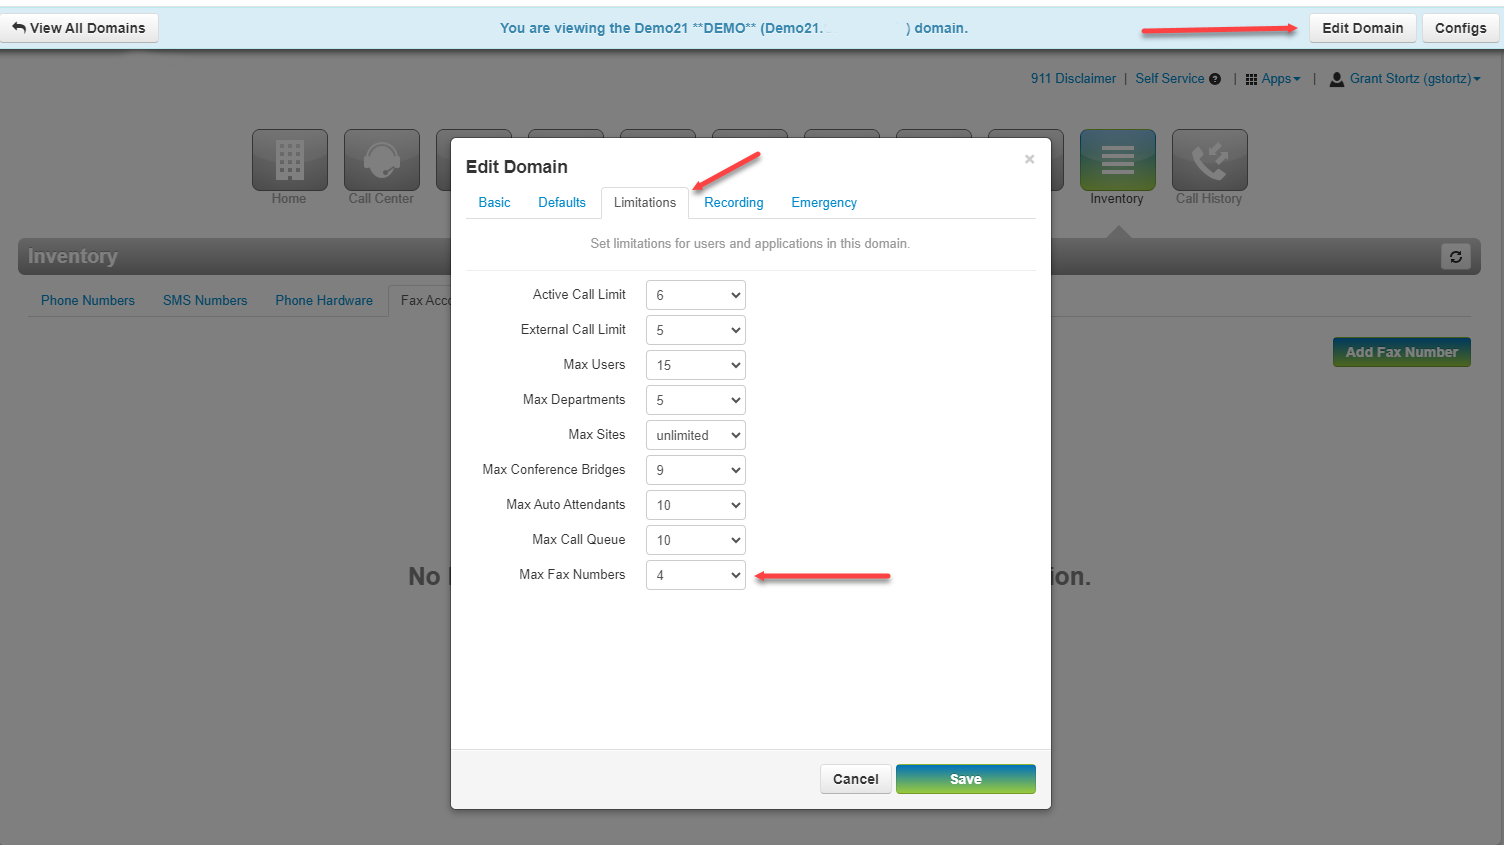
VoiceFlow domain configuration showing the fax number limit setting.
Fax Number Configuration
Each VoiceFlow fax account is associated with a fax number and a user account.
Easy On Net will configure the fax number and assign it to the correct VoiceFlow user. This setup determines where inbound faxes are delivered and which user can access fax features in the portal.
A VoiceFlow fax number may be configured for one or more of the following methods:
- Email delivery
- Portal access
- Email notifications
Inbound fax emails, delivery notifications, and failure notifications are sent to the email address associated with the configured VoiceFlow user.
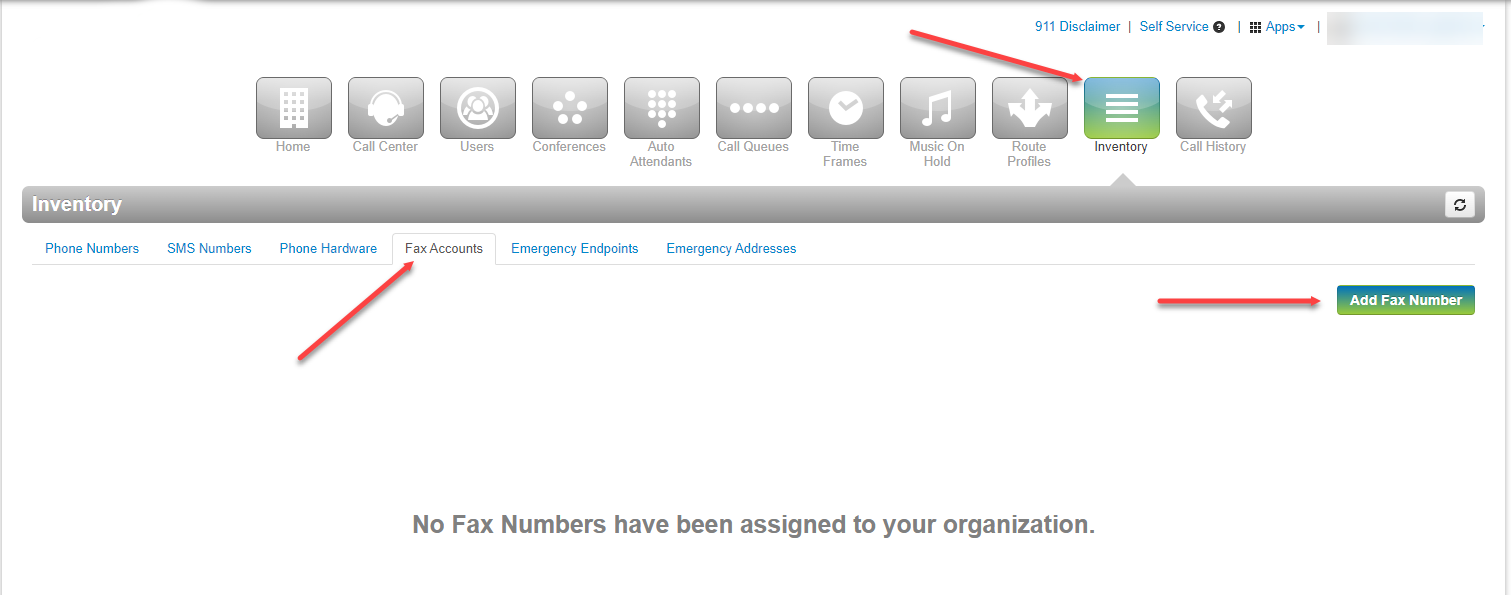
The Fax Accounts tab is used to add and manage fax numbers.

Fax number settings determine how inbound faxes are delivered and which user can access fax features.
Note: A single VoiceFlow number cannot be used for both regular voice calls and fax service. A fax number must be dedicated to faxing.
Receiving Faxes
Inbound faxes will be delivered to the configured email address if email delivery is enabled.
Received faxes will also appear in the Fax Inbox for the assigned VoiceFlow user in the portal.

Received faxes appear in the Fax Inbox, where they can be previewed or downloaded.
When email delivery is enabled, incoming faxes are sent as email attachments to the configured recipient.
Important: Inbound faxes remain available in the VoiceFlow portal until they are manually deleted.
Sending Faxes from the VoiceFlow Portal
If outbound faxing has been enabled for your account, you can send faxes directly from the VoiceFlow portal.
To send a fax:
- Log in to the VoiceFlow portal.
- Select the Fax icon or Fax section.
- Open the Fax Inbox.
- Click Send Fax.
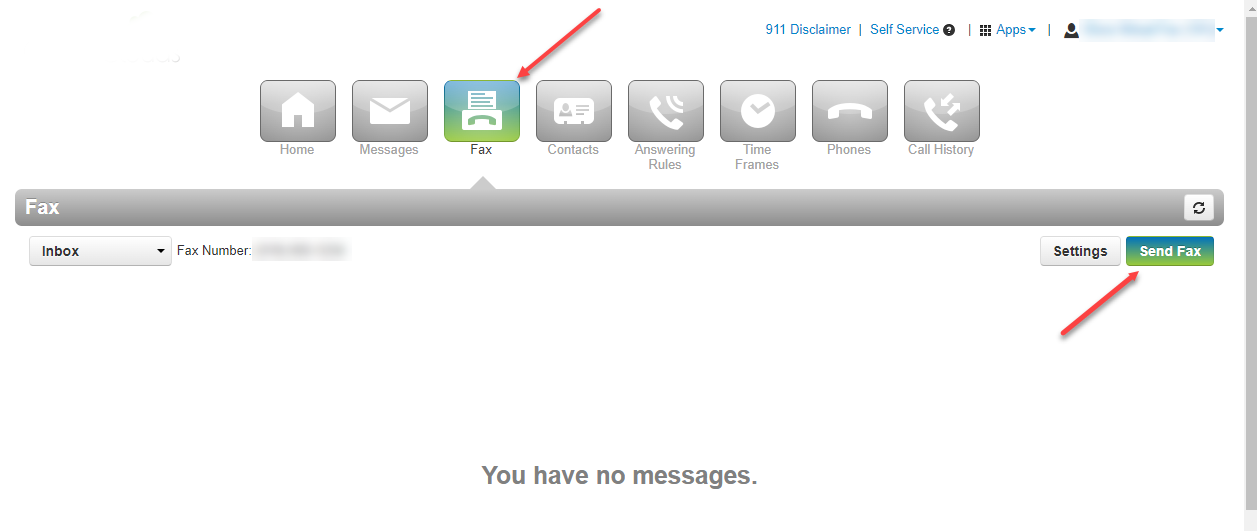
Use the Send Fax button in the Fax section to start an outbound fax.
You will then be prompted to enter the fax details.
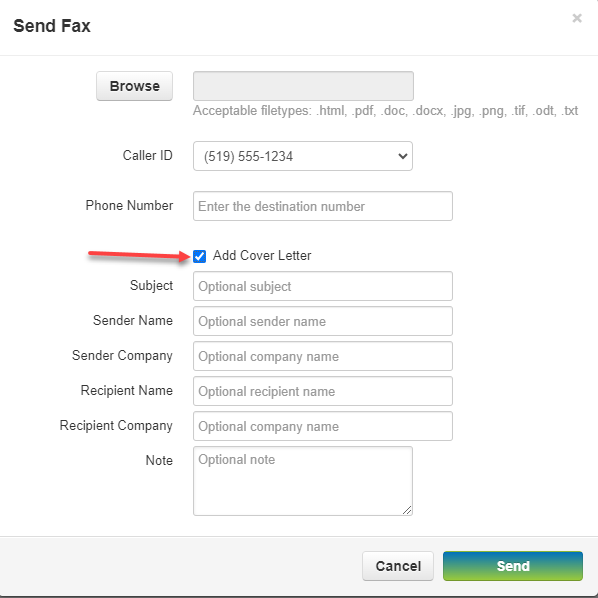
The Send Fax form is where you upload the document, select Caller ID, enter the destination number, and choose cover letter options.
Cover Page Options
When sending a fax, you may be given the option to include a cover page.
Available options may include:
-
No cover page
Sends only the attached fax document. -
Add cover letter
Allows you to enter text that will be sent as a cover page before the attached fax document.
Select Add Cover Letter if you want to include cover page details before the attached fax document.
Uploading a Fax Document
Choose the file that you want to send as the fax document.
VoiceFlow accepts common document and image formats, including:
.pdf.doc.docx.html.jpg.png.tif.odt.txt
For best results, we recommend using PDF files whenever possible.
Caller ID
When sending an outbound fax, select the fax number that should appear as the Caller ID for the fax.
The selected number will also appear in the fax header on the document received by the destination fax machine.
If no valid fax number is configured for your VoiceFlow portal user, outbound faxing may not be available for that user.
Recipient Fax Number
Enter the recipient’s fax number in the Phone Number field.
VoiceFlow accepts 10-digit or 11-digit fax numbers.
Examples:
555123456715551234567
7-digit dialing is not supported.
After entering the recipient fax number and selecting your document, click Send.
After the fax has been processed, status messages may appear in the portal.

Fax status messages appear in the portal after a fax has been processed.
Fax Delivery and Notifications
After a fax is submitted, it is placed into an outgoing fax queue for delivery.
VoiceFlow will attempt to deliver the fax up to 3 times.
If the fax cannot be delivered after 3 attempts, the fax job will fail.
Common reasons for failed fax delivery include:
- The destination fax number is busy
- The destination number is not a fax machine
- A person answers the destination line
- The recipient fax machine does not respond properly
- The recipient fax machine disconnects before the fax is complete
Users may receive delivery status notifications depending on how their VoiceFlow account has been configured.
Fax status updates may also appear in the Sent folder of the Fax section in the VoiceFlow portal.
The Sent folder shows fax delivery status, including failures after retry attempts.
Sent Fax History
Sent faxes remain available in the VoiceFlow portal until they are manually deleted by the user.
Sent fax history may also be removed if the associated VoiceFlow fax portal user is deleted.
Important Limitations
Please note the following VoiceFlow fax service limitations:
- International faxing is not currently supported.
- A single number cannot be used for both voice calls and faxing.
- 7-digit fax dialing is not supported.
- Outbound faxing requires a valid fax number to be assigned to the portal user.
- Fax delivery depends on the availability and compatibility of the receiving fax machine or fax service.
Need Help?
If you require assistance with your VoiceFlow fax-to-email service, please contact Easy On Net support.
When contacting support, please include:
- Your company name
- Your fax number
- The email address receiving faxes
- Whether the issue is related to sending or receiving faxes
- Any error message or failed fax notification you received