We recommend adding at least one alternative contact to your Easy on Net account so we can reach the right person if there is an urgent service issue, outage, or account-related emergency.
These contacts can be used to receive important notices and help ensure that critical updates are not missed when the main account holder is unavailable.
- Sign in to the Easy on Net customer portal at https://portal.easyonnet.io.
- Use a valid email address and phone number for the additional contact whenever possible.
- If you manage services for an organization, consider adding a second staff member or decision-maker as a backup contact.
Step-by-Step Instructions
Step 1: Log in and open the Contacts section
Login URL: https://portal.easyonnet.io
After signing in to the customer portal, you will arrive at your account home screen. On the left side of the page, locate the Contacts panel and click + New Contact....
If contacts are already listed, you can still use the same button to add another person.
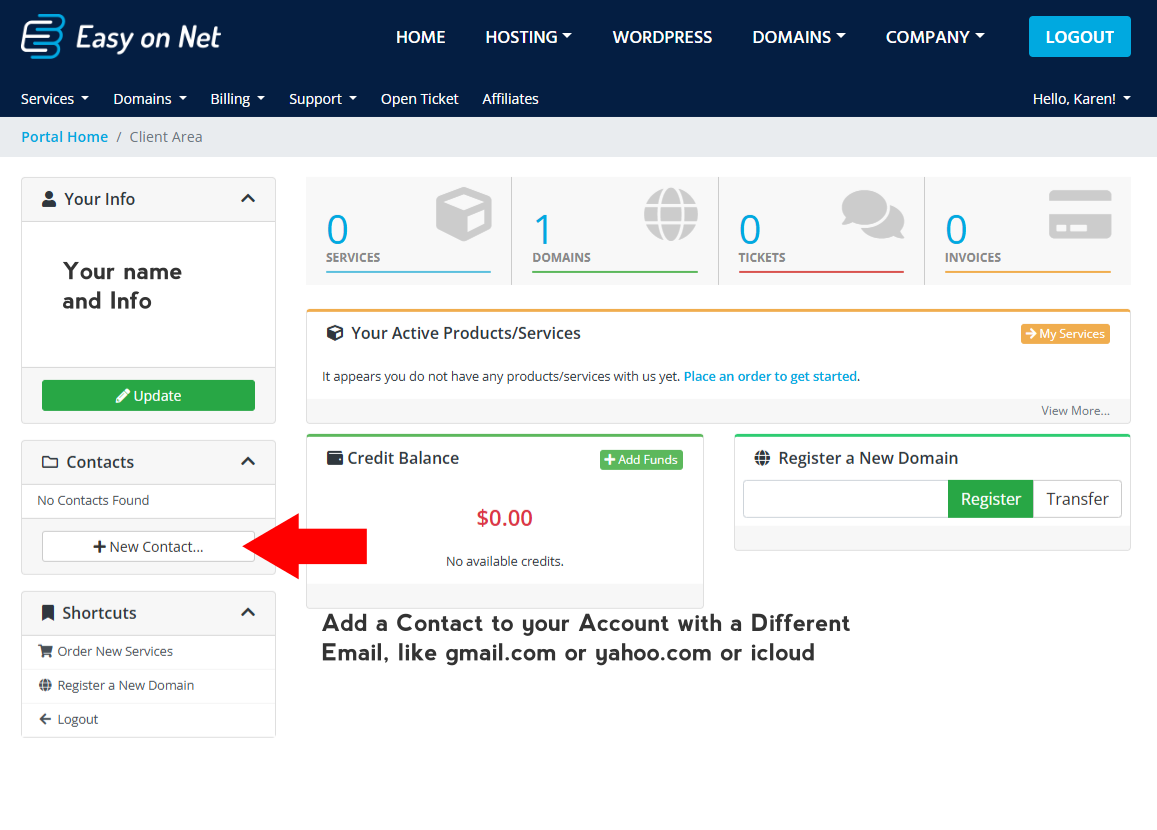
On the account home screen, the Contacts panel appears on the left. Click + New Contact... to begin.
Step 2: Enter the new contact's details
The portal will open the Add New Contact form. Fill in the contact’s name and the best available contact information. At minimum, we recommend providing an email address and phone number so we can reach them quickly if needed.
If the contact works for your business, you may also enter the company name and mailing address details. These fields help keep your account records complete.
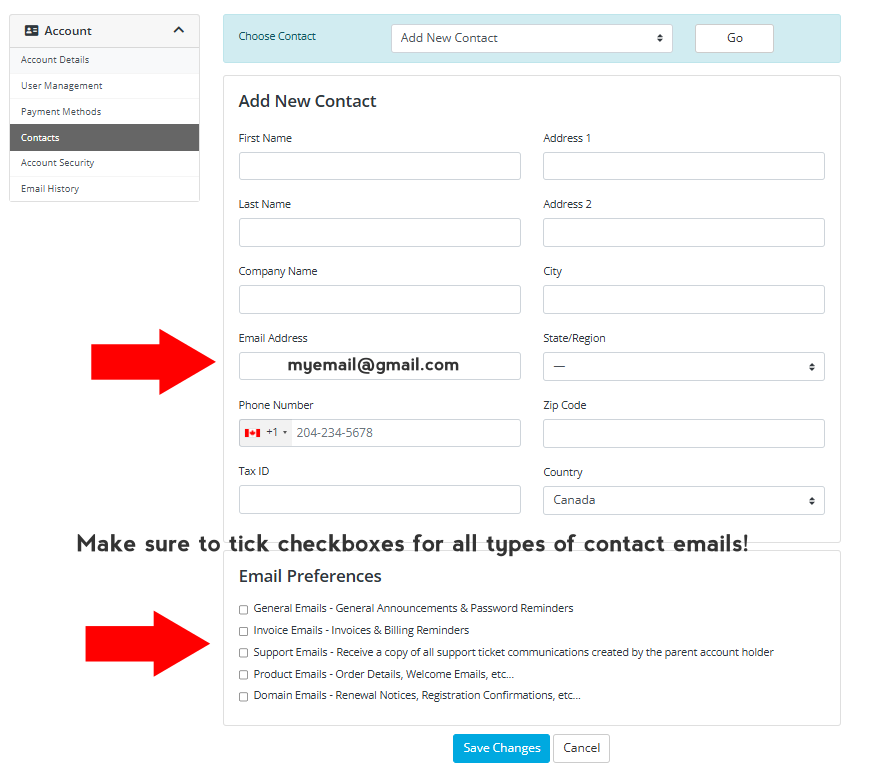
Complete the Add New Contact form with the alternate contact’s information.
Step 3: Choose which messages the contact should receive
Near the bottom of the form, you will see Email Preferences. Select the types of notifications this contact should receive.
- General Emails can be useful for account announcements and password reminders.
- Invoice Emails are appropriate if the contact helps manage billing.
- Support Emails are recommended if this person should be aware of support tickets or service incidents.
- Product Emails and Domain Emails are helpful if they should receive renewal and service-related notices.
For emergency preparedness, we recommend enabling any notification types that are relevant to the contact’s role in your organization.
Step 4: Save the contact
When all details are complete, click Save Changes. The new contact will then be added to your account and can be used as an additional point of contact for important communication.
If you need to add more than one backup contact, repeat the same process for each person.
Recommended Best Practices
- Add at least one contact who is available during business hours and able to make decisions for your services.
- Review your contact list regularly to remove outdated information.
- Make sure backup contacts know they may receive support, billing, or outage-related notices from Easy on Net.
Need Help?
- Email our support team at support@easyonnet.com.
- If you contact support, include your account name and let us know that you need help adding an alternative contact in the customer portal.